MailChimp Email Marketing Integration
A MailChimp email newsletter marketing campaign is a great way to stay in touch with your customer base. We've developed our MailChimp Email Marketing Integration add-on to seamlessly join your shopping cart and your email newsletter campaign for maximum marketing impact.
Compatibility: MultiStore, V10.x
This is a one domain, one cart license installation. To buy additional licenses for additional carts contact sales: sales@compunix.us
Installation Instructions
1) Install the Admin Compunix Add-on menu and add the following line into the add-on links section specified:
Carts up to MS9420: Carts MS95x: Carts V10.x:2) Copy the correct version of
CompunixCommon.dlldownloaded from the
Code Base
link into /bin directory.
3) Upload the license file/appconfig to your cart. If you don't have a license send an email to support@compunix.us with your order number and domain information.
4) Copy/Merge the files from the "Modified files" directory in the .zip file to your website's root folder. If your admin directory is not "admin", you may have to copy any files in the admin directory manually.
5) Skip this step for V10 and goto step 6. Copy the following code to these files/lines, located in the root directory of your website or /web directory. You can also find "updatecustomer" in the file and insert the code after this call.
account.aspx.csline 304checkout1.aspx.csline 1214createaccount.aspx.csline 566
account.aspx.csline 304createaccount.aspx.csline 566orderconfirmation.aspx.csline 254
6) Navigate to your sites Admin console and reset the cache/Refresh Store.
7) For v10 navigate to Compunix Add-Ons > Mail Chimp Sync and press "Sync" button. - else Navigate to your admin AppConfig page and update the appconfigs for your MailChimp account. (To find the applicable appconfigs search for "MailChimp".)
Generate an API key from your MailChimp account (www.mailchimp.com). The bottom of the "Account > Extras > Create a Key" menu includes a link.
On the v10 MailChimp sync page Press the blue "MailChimp List:" link and then modify the first 4 parameters as set in your MailChimp account (key, List, Password, Name).
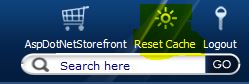
8) Click Reset Cache for the settings take effect.
Features
Double Opt-In: This feature allows MailChimp to send an email to the user to confirm status of the subscription.
Send Goodbye Email: If a user un-subscribes from the list, MailChimp will send a confirmation email.
Ok To Email: Honors or ignores the "Ok To Email" field on the users account.